project log...
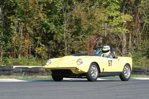
1968 SAAB Sonett - aka "SONEAT"
SONEAT is a one-of-a-kind SAAB. There's not another like her.
|
Date |
Description |
Winter Project: |
|
|
|
|
|
|
|
|
|
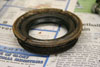
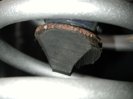
| 11-13-08 | Secondly, it turns out that Jack (Lawrence) guessed correctly and wins the teddy bear... The screw-in retaining ring that holds the wheel bearing in place had come unscrewed, allowing the bearing to move in the spindle. My guess is that the stake-ring broke where it was staked to keep it from coming loose. I see no other way that it could spin free. It is pretty beat up and I think is junk now. The bearing, near as I can tell, is fine. It may not need replacing? |
| 10-24-08 |
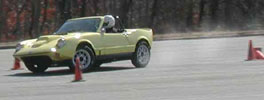
Saturday dawned wet and rainy. I swapped over to the Dunlops as they had a good bit more tread than the Hoosiers. In the final checks before going out on track I noticed the brake fluid was low. Further inspection showed that the left side brake caliper was leaking. Even more inspection revealed that there was some sort of problem in the spindle that allowed the hub to move out a 1/4 of an inch. This caused the brake disc to rub on the inside of the brake caliper, heat it up something fierce, and melt the rubber seals. We were done for the weekend. I put it on the trailer, towed it home, and picked up the Quantum 1 to take back for the rest of the weekend. |
| 10-21-08 | The repaired cylinder heads arrived. |
| 10-16-08 |
|
| 10-11-08 | Dad and Jeremy, working from photos that I emailed to them, fabricated an aluminum swirlpot to be installed when Dad gets back, the day before the VSCCA NJVGP. |
| 10-08-08 |
|
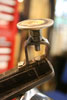
Ordered an electric fuel pressure gauge so I can read it in the engine compartment while driving. |
|
The oil cooler leak turned out to be a faulty braze on our custom made hose connections. That's fixed now, but I think the cooler itself may have sprung a leak. Took the heads to Alderman's to get them measured for flatness. Pass side head:
Pass side head:
Spoke with Jack Lawrence about this and he thinks I might be able to "fudge it" with some tricks. We'll see. |
|
| 09-19-08 | We took the car to the VRG event at the New Jersey Motorsports Park (Lightning Course). The car was quick (third fastest in my group behind a Ginetta and a Lotus 7) but overheating. Finally determined that the headgasket (passenger's side) was blown and we were leaking combustion gasses into the coolant passages. Also, we had a persistent oil leak from the oil cooler. |
| 08-25-08 |
|
Installed new Carter fuel pump |
|
| 08-05-08 |
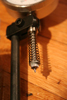
The problem is that the internal spring is not nearly strong enough. You can set up the gauge, let go, and it just flops down to the end of its travel by virtue of its own weight. The only way to use it would be to hang the engine over your head and work upside down. I unscrewed the pointy tip from the end of the dial indicator and found a small washer that it. I went to the Home Depot and got a variety pack of springs. One of them was a near perfect fit. Once all reassembled, I had something that looked like this and worked just perfect. Problem solved and rod bolts torqued! |
| 06-29-08 |
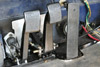
With the new other pedals, the loud pedal needed to move over a bit to the left. Also, the throttle stop needed to be a little bigger. |
| 06-26-08 |
We are adding:
|
| 06-15-08 |
|
| 04-21-08 |
|
| 04-06-08 | Road trip. |
| 04-03-08 | Mounted and balanced the new Hoosier Speedster tires. |
| 03-31-08 | Ordered from Bob Woodman Tires: |
| 03-30-08 | Dad and I finished configuring SONEAT to be inspected and registered with a "Historic" registration. Only tires remain. |
I sent Jack a NEW 1500cc crank that I had on the shelf. |
|
Damage report:
| |
Took a road trip and dropped off most of the engine with Jack Lawrence (Motor Sport Service). He will check it over, find the problem, report back, fix it all, put together the bottom end. |
|
| 01-23-08 |
|
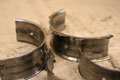
Once home, I disassembled the engine to find 2 spun rod bearings and a chunked up camshaft gear. All the bearing surfaces in the engine are shot. The crank is very badly scored! I don't know if the oil pressure came first or the camshaft gear came first or if it all happened at once. Every theory I've come up with for a cause has been inconclusive. |
|
We went to Watkins Glen. One problem, I think, is the fuel pump was dying. There was a great struggle to find a replacement and eventually, some $70 later, I had something that worked. It was about this time that I realized the oil pressure was really bad (~30psi) and getting worse AND I could hear something wrong in the engine. I shut her down and put her on the trailer. |
|
| 10-15-07 | Went through the race prep on the car.
|
| 10-14-07 | Borrowed the D-tag again to try and figure out the running |
|
|
| 10-07-07 |
After installing the rebuilt rocker shaft assemblies with the lightened rocker arms, I found that the adjuster bolts weren't very tight. Certainly not tight enough. So, I removed them all and with a hammer and dolly block deformed the holes.
With a 6mm deep socket and an extension fitted to my drill, I spun the oil pump driveshaft until I saw oil running out of all 8 rockers. Hear that, ALL 8 ROCKERS! Awesome.
I'm getting excited. After I put the valve covers, intake and distributor back on the motor, it is ready to go in. It will be my first time ever doing it by myself, but it shouldn't be too hard. I think I might actually make it to Watkins Glen! |
| 10-06-07 |
|
| 10-05-07 | Put the block on tthe stand, put the crank in and put the #1 and #3 pistons in. That's as far as I got before dinner and a movie time. Mexican takeout night! WooHoo! |
| 10-04-07 | NOW begins the frantic rebuild. |
| 10-03-07 | Picked up the block and head at Alderman Machine. |
| 10-1-07 | Cleaned and honed the lightened rocker arms. I'm not sure if I will use them or not. |
| 09-30-07 | Reinstalled the brake master cylinder. We have PEDAL! |
| 09-29-07 | I cleaned up the master cylinder bore with a hone and reassembled it. I used a different top cover and a new handmade gasket. With Dad's help, I got it all back together. |
| 09-27-07 | Picked up the freshly powdercoated timing cover from Viking Wheel. It is just a clearcoat over bare blasted aluminum and it ends up looking like gray paint. FREE! |
| 09-27-07 | Checked with Wally and Bill at Viking Wheel about welding the timing cover... No go. They said it would be simpler to just use my spare rather than risk warping the cracked one. Picked up the second set of wheels freshly powdercoated silver. They are Shelbys so should be even stronger than my Ronals. |
| 09-17-07 | Dropped the bearing sets off at Alderman Machine. Cleaned the oil pan out. An awful lot of the crank gear was in there. Figured out that the cover on the brake master cylinder was leaking because the "big bang" threw the transmission over into it and bent the cover. I didn't notice this when we were working on the repairs. It wasn't until I found the resevoir was empty just before loading onto the trailer and heading out to the PVGP that I noticed something was wrong. I could tell it wasn't leaking internally, and I had a good pedal, so I decided the cover was leaking. I didn't know why but decided as long as I kept it topped up, I'd be OK. So now I finally get to look into it and sure enuff... More "big bang" damage. I cut the fan-bearing nose off another timing cover in preparation for a freeze plug and use in case Dad isn't satisfied with the repairs to the original cover. Dad and I decided we would install a dual brake master cylinder setup over the winter. Thusly, we aren't going to spend the big bucks on rebuilding the current master cylinder. We'll put it back together with as many good parts as we can and run it 'till the end of the season, then retire it. We also discussed installing an engine oil cooler over the winter. I've got one out of my old 9000 parts car that might work and we have an oil filter relocation kit in Dad's parts stash. |
| 09-13-07 | I placed an order with Jack Lawrence (MSS) for 2 sets each of balance shaft bearings and camshaft bearings. During the conversation I let him know that I had included a couple good gears for him to check the mesh-ability for me. I dropped the engine block, passenger side cylinder head, cam and balance shafts of at Alderman Machine and asked Paul to:
I installed the new fuel pressure gauge. Spent some time cleaning up the engine bits in preparation of the upcoming rebuild. In doing that, I found that the timing cover is cracked. So now I have to prepare another one. |
| 09-12-07 | Removed the brake master cylinder from the car and mostly disassembled it. I've left the piston assembly together, but it is out of the clinder. I see some marks in the bore that don't look too bad but COULD be a reason for our soft initial pedal. I'm checking on a rebuild (service) cost. Packaged up the damaged timing gear set. Also threw in my other good iron balance shaft gear and a stock crankshaft gear for Jack to check. I dropped the box of gears off at SCS to be shipped to Jack. |
| 09-11-07 | Disassembled the engine down to a completely bare block. In general, things still look OK. I found some metal in some of the oil passeges and there is of course a GROSS of the stuff in the oil pan. But all shafts still spun smooth and easy. One thing that worried me is that the piston for the cylinder that had the bent pushrod shows a mark that indicated contact with the valve. I hope we didn't bend a valve. |
Removed the engine and took a look at things... Discovered: CHEWED timing gears. |
|
| 07-27-07 | Ordered a rocker shaft for a much later and much larger V6. I think it is a 4 liter for a Ford Explorer, but I'm not sure. It hasn't arrived yet so I don't know yet if it will fit. |
| 07-19-07 | I just got this message from FordParts.com... "Stefan k Vapaa, Order ******** Ford : E9RZ6563A ( SHAFT VALVE ROCKER A) Thanks for using FordParts.com-Your online source for Factory Ford Parts and Accessories. The item/items that you have ordered/looking for has been discontinued by Ford Motor Company and is no longer available." So, I managed to find ONE (1) assembly at greensalescompany.com/ and bought that. So far, that's the only one I've been able to locate. |
| 07-18-07 | Ordered 2 new V6 rocker shaft assemblies from FordParts.com. One for now, one Ford Service Part #E9RZ-6563-A |
| 07-14-07 | Went out for the first practice session and kept the revs down below 6500rpm. After the 4th lap, things started running bad and hot. I pulled into the pits and shut it down, pushing it the rest of the way to our pit spot. After a bunch of troubleshooting and wrong guessing, I finally determined that we weren't getting any oil to the right hand cylinder back of valvegear. The rockers siezed, a pushrod bent and the bolts retaining the rocker shaft stanchions PULLED OUT OF THE HEAD. Well crap. Put a fork in me, I'm done. Now, we have to determine why we aren't getting oil to the right valvegear, fix it, and then rebuild the valvetrain. |
| 07-13-07 | Loaded and trailered to PVGP. The trip was awful. Took FOREVER. Lost the key to Mom's car. |
| 07-12-07 | I decided that I had ONE MORE SHOT. I had ONE MORE intake gasket in my stock and a couple sets of head gaskets. After cutting the intake and going through the whole thing all over again, I filled the system with water and saw nary a drop of errant water. Horay! I poured in the other vital fluids and pre-cranked the moor to build a little oil pressure. Finally, I turned the switch to fire it. Things didn't work right off the bat as I had to adjust the timing, but once I did she fired up nice and easy! I set the timing at 34 degrees all said and done. I checked the float level on the carb. After a LONG trip to PHL to pick up Jeremy, I installed the rev-limiter and buttoned things up. |
| 07-11-07 | The engine/trans combination was installed in the car and all the hookups made. Late at night, I started filling the cooling systemn with water. Only, it leaked. Water seeped from the head gaskets and poured out the side. I was beat. I opened the drain and turned out the lights. |
| 07-10-07 |
Enter ingenuity. Great mooggly googgly that is fantastic! Now, to shift gears... BZZZZZZZZZZZZZZZZZTt. Ok. No shifting gears. No clutch means no shift. Got it. Switch off and wait for the spinning to stop. NOW shift gears. Turn on and run away, but not as far away. I am supremely confident now. Rinse and repeat. 3rd time is 4th gear. 4th gear scares me. The vibrations are violent and I fear I've crossed the rubicon with my bot quite Goldbergian creation. I quickly shut it down and go back to the much less fearsome 3rd gear. It ran steady for about 20 minutes more. I briefly ran it through a few more gears (including, for a time, reverse) and then dissasemble, drain, and prepare for installation.
|
| 07-09-07 | Dad collected some shock bushings for the "new" Koni's. Also, the wheel for the Sonett. However, the gearbox SCS was supposed to have rebuilt for us is not finished and will not be finished. So we will have to try and clean up and use the one we have. It is the wrong final drive and there is rust on the gears, but we have no other choice. CRAP. |
| 07-08-07 | Continued building the engine. Got as far as the intake manifold and had to wait overnight for the glue on the intake gasket to set up so I can carve the intake ports in the gasket. Dad and I inspected the last remaining gearbox I had, in case we had to use it. It doesn't look great, but it might work. |
| 07-07-07 | Sandblasted and painted the shocks. Started assembly of the engine. I got as far as having the crank and pistons and rods all installed but got delayed because I needed a different torque wrench that went lower (fewer ft/lbs) than the one I had. |
| 07-06-07 | The balance shaft and camshaft bearings arrived at my house by 10:30. Dad dropped them off at Alderman Machine an hour later. I picked up the engine block, pistons and rods at Alderman Machine. The heads arrived from MSS too. |
| 07-05-07 | Ordered camshaft and balance shaft bearings from West of Sweden. I called after the UPS driver had already been to visit Chip, but he called her (on her cell!) and got her to stop back by so my bearings could go out that day. Thus, they will arrive TOMORROW in time to get them to the machine shop and have the block done for the weekend. Great service from Chip at West of Sweden. |
| 07-04-07 |
|
| 07-02-07 | Received flywheel/clutch/pressure plate assembly and crank from MSS. |
| 07-01-07 | Looked at the rear brake adjustment. I'm out of available adjustment now, so can only make up the play by pulling the handbrake on a few clicks... 5 to be exact. |
| 06-28-07 |
|
| 06-21-07 | Bobby Gant is still working on rebuilding the gearbox. There seems to be a dearth of good parts between the old box and the used one we delivered for parts. I dropped the RF wheel off at Viking Wheel to have the gouges welded up. Ordered a new gasket set from West of Sweden. Chip said it should arrive tomorrow. Talked with Jack Lawrence (MSS) who confirmed my choice of the Pertronix Digital Rev Limiter as a good engine guardian. He is going to look and see if he can get me a good price on it! Also, he's going to see if he has a tachometer I could use in place of the stock unit. Soldered the kill-switch end battery cable connector-end on. |
| 06-20-07 | Purchased two (1 for now, 1 extra) battery cable ends from Tri-State Battery. What a great store. Very helpful and always friendly. Removed the old battery end from a battery cable I'd pulled from my parts collection... And routed it in the car. I still have to put the new end on the killswitch end. Sandblasted and painted the (from parts collection) coolant hose that divides the coolant flow for the two banks of the block. |
| 06-18-07 | Bit of sanding on the chassis followed by a bit of primering and a bit of painting. |
| 06-11-07 | Dad and I torched and beat the rest of the chassis damage into submission and welded up the last of the holes. |
| 06-10-07 | I MIG welded the shock mounting point and some more of the holes in the chassis. Just a couple more to go. |
| 06-09-07 | Started the day with a run to Alderman Machine to drop off the CORRECT end caps. Dad banged on the chassis and gas welded some of the holes. |
| 06-08-07 |
Dropped the 1700 crank off at Alderman Machine along with all the WRONG end caps for the blocks. Fixing that little error will require another visit tomorrow. Went home and located the correct end caps... One set in Dad's basement and one set in mine. |
| 06-05-07 | Jack Lawrence called to say that he wanted to take a look at the valves from our heads. He sees some evidence that the valves were flotaing, or had floated. So, I packed them up and Dad shipped them off. |
| 05-29-07 | Since VIR, we have taken things apart, inspected, and ordered a bunch of new bits and pieces. Cause of the destructionFirst, it appears that the failure in the clutch region was initially the pressure plate. We have come to this conclusion based on the fact that the clutch disc friction material was shredded on the pressure plate side, but perfectly intact on the flywheel side. The friction surface of the flywheel is still intact. If the flywheel had come apart first, the pressure plate friction surface would have little reason to follow suit. Make sense? New engineWe have decided that the new motor for this car will be a proper 1500. That's the correct motor for the car after all. We are going to go to the limit of legality on the overbore and have ordered .060 over pistons. They will be custom forged and milled pistons aiming at about a 12:1 or 12.5:1 compression ratio. We also will utilize a more efficient intake manifold that turns the carb north-south vs the east-west of our stock Weber setup. We are switching to a Solex 40 PII carb (with accelerator pump). Apart from this, it will be a pretty standard race setup. TransmissionThe plan is to use the same final drive ratio, but we need a new gearbox built up. |
| 05-05-07 | Bummer.
|
| Feb-07 | We took a trip down to Underwood's race shop where Jeff and I built a new rollbar. I had Wally at Viking Wheel powedercoat it. It turned out great. |
| 11-05-06 | We were back at the Shenandoah course again, but this time with the VSCCA. It all went very well and the Sonett ran spectacularly. |
| 10-01-06 |
|
| 07-16-06 |
VIDEO!Click here to view the low-res YouTube version. |
| 07-09-06 | There was a bunch of race-prep that went on prior to our trip toi Beaver Run for the PVGP Historics, but it was fairly mundane. Much more exciting was the PVGP Historics. Duh. The car ran very well. The only nagging problem is an oil leak somewhere. It keeps lunching oil out the right hand side and I don't know where from. I canna figure it out. I ran in the "over 2 litre" class this past weekend where everyone either had bigger motors or were on stickier rubber. But I managed to show well in the end. In the Saturday race I managed to hold off the charging Honda S800 of Doug Meis and last to the end when so many others dropped out. I finished 1st in class and 3rd overall behind Tivvy Shenton in his Jag and a Ginetta. In the Sunday morning race I again had to fend off the challenges of the S800. He really made me work. Traffic was my friend and I managed to get a gap by putting some cars between us in key spots. At the same time I was pressuring Fred Danowitz in his Triumph Spitfire. He had so much more power than either hte S800 or I, but we were running very similar laptimes. He would put a couple seconds between us on the front straight and I would spend the rest of the lap catching him back up. In the last turn I could pressure him into making mistakes in the brake zone and get inside of him, but he just powered back by on the uphill run through turn 11. In the Sunday afternoon feature, I didn't want to push the car so hard. I was hoping to save it for the PVGP next weekend. So the Honda guy and I talked and agreed to back down a bit and swap places some to see how the other felt. It was definitely easier on the car, but not the same kinda fun. I think we put on a good show though. When the "1 lap to go" sign came out, I saw Doug put the hammer down. So, I did too. We ran that last lap as hard as we could but ran into traffic that got us slowed up. On the last corner he protected the inside line and made me go around the outside of him. We powered up the hill and I started to come alongside him. At the finish line we were side by side but I think he got me by about 6"! Despite taking it easy, I still broke something. Due to the flared portion of the exhaust header corroding and wearing away, the driver's side exhaust pipe came out of its flange. It was probably like that for a portion of the last lap but I didn't notice. It shouldn't be too hard to fix. |
| 06-19-06 | Dad came over and fabricated a mounting system for the cooling fan and mounted it (mostly). I installed the alternator and he hooked up the remaining cooling hoses. |
| 06-12-06 | I modified the passenger side valve cover to clear the hood. Pictures to follow. |
| 06-11-06 | I replaced the crank seal and set about reinstalling the motor. It went in fairly easily. I yanked one of my spare Sonett III starters from the shelf and installed it. Then we bolted stuff up, hooked stuff up and tied things down. It isn't all finished yet because we still have to fit a new cooling fan and modify the passenger side valve cover to clear the hood. |
| 06-03-06 | Last night I washed the car as best I could to get all the oil off it. It all came from the Formula S leaking gear oil all the way back from NHIS. Today Dad and I pulled the engine out. The crank seal appears to have been installed slightly askew. We didn't do that, it was like that when we bought the motor. We simply failed to notice it. In all fairness, it is only SLIGHTLY askew. |
| 05-21-06 | NHIS was fun! We had some mechanical problems, but the car finished its last session and we drive it on the trailer. The car ran fine for the instructor portion of the school and I even took it out briefly on the student day to show the students how I go around an autox course. Saturday the weather dried up but overall things went all pear-shaped for me. I went out in the first session and was running well when the clutch started to slip. I tried to manage it by changing my shift style but it just got worse the longer I ran. Finally, I brought it into the pits and parked it. Opening the hood, we found engine oil in the engine bay. It was running out the inspection cover on the bell housing. My diagnosis is that at some point, possibly at VIR, we blew the rear-main crank seal out. This poured oil onto the flywheel and clutch, causing it to slip. The reason I didn't see it on Friday was because the sessions were shorter and the problem was less obvious in the wet. Sunday morning I made some modifications and rerouted the oil breather tubes. I went out in the race and it seemed to be working fine! Yay! But I still had a blown seal and there was no way I was going to suck it back into the motor... So it was only a matter of time. Eventually, the tires started feeling slick and the clutch started slipping. I lost contact with the Porsche 914 I was chasing. I just babied the car and tried to get it to finish the race, which it did. I'm not certain whether I was blowing oil onto the tires or if they were just getting hot and greasy with my hard driving... But I lost grip after about 4 or 5 laps and simply couldn't get it back after that. I had to back off and just go slower. We're not likely to be changing the tires soon, so I need to find a way to ease the load on the front tires. Either I need to be more aggressive with my driving to get the car to rotate or I need to tune some of the grip out of the rear end. I'll try a little of both and see how things work. Next event... Beaver Run. After that... Pittsburgh Vintage Grand Prix. |
| interim | Yeah, in the interim... I didn't keep great track of things. But we did some stuff. It turned out that the vibration was caused by a loose rear mount of the lower left A-arm. It would move in cornering and cause the driveshaft to run in and out of the inner driver... Causing vibration. Dad tightened it up and that was solved.
|
| 05-01-06 | Car ran GREAT at VIR! No overheating at all, so the cooling re-do is a success. The brakes seemed a little soft to me, but Dad thought they were fine. No real problem there. I'll get to check the pad wear as soon as the car gets back from its extended stay in Durham. The clutch didn't slip at all and worked fine otherwise. I had some really great dices and it was surely nice to be able to use the full redline. I finally got to do battle on an even playing field with the other cars. I think I put on a pretty decent show. Video and pictures to follow. I was dicing with an MGB in the last session of the weekend when suddenly I got a severe vibration coming from somewhere in the front end. Dad thinks it is a CV joint gone bad. Also, we had to fight the freewheel jumping out a little too often. I want to put together a new gearbox with a 6 roller freewheel. |
| 04-25-06 | Car is loaded on the trailer ready to roll. VIR here we come! |
| 04-24-06 | Dad cut out some stick-on nines. I removed the 3's and replaced with 9's. Number now matches my VRG competition number... 97. |
| 04-22-06 | We finished up preparing the car. Dad adjusted the valves while I torqued the lugs and safety-wired the engine oil drainplug. |
| 04-20-06 | Ordered a bunch of fuses and cotter pins from Sherco Auto. |
| 04-16-06 | I still had a lot of work to do on the dang SPG, so I worked on that until late afternoon when I reached a stopping point. Dad came over in the mid afternoon with the Quantum One on the trailer. After unloading it and dropping the trailer off, he started working on the wiring for the fuel pump and cooling fan. He got the two circuits seperated and wired to an auxiliary fuse panel (that is visible from the driver's seat and gives each their own fuse). After that, we adjusted the clutch freeplay, installed the oil filter, oil and coolant. We then started the car and let it warm up. It didn't act exactly as expected. I was trying to watch the temp gauge and see when the thermostat opened, but either it is stuck open or I missed it. It started to get hot, so I turned on the cooling fan and it cooled just fine. I think it is notable that the coolant went in easily and once full, and after having run, didn't seem to need any topping-up or burping at all. That's a good sign, but I sure hope it works. |
| 04-14-06 | After getting to work and finding noone there, I realized that it was a holiday. How many times am I going to do this? I figured I was going to get bunches of things done on SONEAT with my newfound empty day... And then the brakes on the SPG started to grind. Oh damn.
|
| 04-12-06 | Purchased oil filters. |
| 04-09-06 | A lot of planning and parts fabrication/collecting came together and it feels like we made a big step. I installed the new brake lines from Chip and finished the fabrication of my super-slick copper-to-air brake piston insulator thingies. Then, I installed the thingies, brake pads, spring clips and cotter pins in the brake calipers. Dad and I hooked up the brake lines and set about bleeding the brakes. The rears are a giant PITA (need a smaller hose) but we managed. We still need to adjust the rear brakes, but if you pull up on the handbrake, you get a good pedal so... YAY! Dad mounted the fuse panel he was working on (see my earlier post). We bolted the wheels on and found that there was some interference with the brake (hard) lines. A little bendy-tweaky and that was fixed. Finally, we put the car down on its wheels and remounted the hood for the first time in over a month. We closed the hood and confirmed that the tires clear the fenders. The new wheels look pretty darned nice on there. Proper and all that. Dad mounted the catch can for the crankcase ventilation and I started installing the harnessbelts. |
| 04-08-06 | Dad and I made a little progress. Dad completed the fabrication of the brake (hard) line brackets and I gave them a sandblasting and a coat of paint. He also fabricated a mount for the new crankcase ventilation catch-can. I blasted and painted that. Then, from my stash of junk, he modified an old coolant expansion tank cap so that it would vent without needing to be pressurized (basically just removed the center rivet). More blasting and painting. He fabbed a bracket to relocate the fuse panel to a place where the driver can see it. Blast, paint. I B&P'd the spring clips and cotter pins for the brake calipers. He brought me a Brew-Ha-Ha cup half full of 1/4 20 bolts, so I'd have some next time we needed them. Then, he used some of those to mount the remaining firewall blanking plates. I know I worked on something else during all this besides just blasting and painting, but I can't remember what. So I guess as far as this record is concerned... That's all I did. Oh yeah... Just remembered that I fixed that second throttle return spring that wasn't pulling straight. Should be fine now. |
| 04-07-06 | Sam and I tripped out to his office (Shriner's Hospital For Children in Philadelphia) to pick up the rollbar tubing that I'd ordered. It was delivered earlier today. Three 20ft sticks. We strapped them to the roof of the Suburban to get them back to his place then cut them into 4 five footers, one 11 footer and one 9 foot length. Daringly, we slid them into the SPG through the passenger's window. I already had a bunch of file cabinets in there, but so long as the mirror held it would be OK. It was a chill evening but I turned the heater on high and I was nice and toasty on the way home. Once I got onto I-476, the mirror started to go all wonky. It got bent out of its socket and started to turn down. All I could see was blacktop and the white line. I tried to reach over and reset the tubing, but that was a pipe dream. Every bump I hit, every dip in the road and seemingly ever joint inthe road sent the mirror angling more towards the pavement. As I pulled off I-95 it was just starting to -ACK!- rain! I arrived home and hurriedly moved the sticks into the garage and wiped them off with a towel. Not a moment too late, as the downpour started while I was locking the garage. I ran back to close the windows on the SPG and then went inside to go to bed. Note: I would not notice until the commute on Monday that the mirror had survived, but was still aimed a long ways from showing me anything but the stuff I was driving on. When I got to work I pulled and reset it in its socket. Good as new! I now declare this mirror to be a "structural mirror capable of supporting approximately 100lbs over a distance of 25 miles at speeds up to and including 80mph". |
| 04-06-06 | Dad came over this evening (Thurs) and we made some progress. I cleaned up all the caliper pistons we had and selected the best 4. I was lucky to find some Girling rubber grease in a slave cylinder rebuild kit that I had stashed away so I coated the piston seals, caliper half seals and pistons and bolted everything together. 80ft/lbs was scary. I was so afraid I'd strip something out. But, other than rounding a bolt head on one bolt that was more corroded than the others, I had no problems. Now, I just have to hope that everything seals up and that the fluid can get from one half of the caliper to the other without problem. Note: The Saab version of these calipers uses the Healey Sprite pistons, even though the caliper casting is otherwise identical to an MGB. The MGB uses 2.125" pistons and the Sprite uses 2" pistons. The Saab uses 2" pistons. So, when ordering rebuild parts, get the Sprite rebuild kit. When ordering brake pads, get MGB pads. Fingers crossed.Dad fabricated some more firewall blanking plates and finished the one I'd started. They are all installed except one, which needs a couple bolts I didn't have on hand. After I found a couple of 1/2" to 5/8" adapters in my parts stash, Dad finished cutting the cooling lines to length and installing them. I installed the alternator and belt and hooked up the wires to that and to the cooling fan. |
| 04-05-06 | Collecting parts...
|
| 04-04-06 | Ordered new stainless steel braiding armored brake lines (for the GT 850/MC/Sport calipers) from West of Sweden. |
| 04-03-06 | I installed the coolant expansion tank and hooked up some of the cooling lines. Some new ones need to be purchased and cut to length. Began fabrication of blanking plate for the heater box. Began fabrication of copper brake pad backing plates. |
| 04-01-06 | Since I wasn't able to find a local source for shotpeening, I did it myself. No, I am not certain I did it completely correctly. I used some steel shot that was leftover from another project and was sitting in a box at Jake's. I am certain that I got 100% coverage of the area I was concerned about. I made sure of that with a visual inspection aided by a magnifying glass. I just don't know what intensity I achieved. I didn't have time to purchase any Almen strips or to fabricate a test holder or gauge. At this point, if I did no harm I will be happy. So I reassembled the clutch pressure plate with the three additional red (heavy duty) springs (6 total) and the shotpeened fingers. Then I bolted it onto the motor with the new clutch disc and our slick new clutch alignment tool (read: old clutch shaft). Dad did some running around and figuring out trying to get a brake line setup pieced together for the front calipers. He didn't come up with anything perfect, but we are getting closer. I installed the pan gasket and in the process discovered the front transmission cover was very loose and was missing one of its bolts. I tighted it up and replaced the missing bolt, but I wonder how it got so loose? I guess that it is very likely that it was the source of much of the oil leak we were chasing. Dad and I installed the motor in the car and hooked it up minimally, mechanically and electrically, just enough so we could turn it over on the starter and test that the clutch disengaged properly. The pedal feels weird, but it worked. So we continued to install and lock down stuff. Dad modified the engine-side-brace by removing the old worn out rubber and refitting it with a minimal amount of fuel line (rubber). It is basically a hard connection now, which is fine with us. I installed the new piece of the throttle linkage and at the same time, changed the way the throttle return springs worked by seperating them in direction of pull and mounting location. |
| 03-31-06 | Dad picked up a gasket set (minus thermostat housing gasket) from Sports Car Service. Our primary concern was the pan gasket, which was included. He also mounted up the two NEW Dunlop 500-15 (204 compound) race tires on my wheels. |
| 03-27-06 | Dad mounted the best 2 of our remaining used Dunlop 500-15 (204 compound) race tires onto my wheels for use on the back axle. When I got home, I test fit them on the car. I was not a little bit worried that we were going to have clearance issues. *cringe* These tires at www.sascosports.com. |
| 03-26-06 | Dad and I worked on a few things today.
|
I ordered some little ball-joint ends (from McMaster Carr, Part Number: 6058K32
$3.65 Each) to replace the current plastic ones on the throttle linkage. I also got a bit of 1/4" steel rod that I cut to length and cut some new threads on the ends. Dad provided a couple 1/4-28 nuts for locknuts and I assembled it all into a replacement linkage. Pictures to follow. |
|
| I cleaned and installed the rear brake drums, torqued the axle nuts (80 ft-lbs), installed the cotter key and the nut cap. Installed the front hubs (with discs), but once on the ground they will need to be torqued (160 ft-lbs) and cotter keyed. |
|
| 03-18-06 | Dad and Jeremy installed the lug studs in the rear drums and front hubs. Pictures to follow. |
| I collected a set of lug nuts from the Sports Car Service stock of used early 900 lug nuts. Thanks Bill. | |
| 03-07-06 | Tonight I bolted the front axles and spindles back onto the car. I also started to clean up the brake discs. Dad pulled the seals and bearings out of the old Sonett brake drums and the 4-bolt drums. He cleaned them all up and they are ready to be greased and installed in the 4-bolt drums. He also purchased the necessary brass plug to close the hole in the top of the thermostat housing... And I installed it. I called MSS and spoke to Jack and Pat about some parts. I ordered three more (red) heavy duty clutch springs, a new clutch disc and if Jack can find them, 16 wheel studs that are stepped 5/8" UNC on one end and 1/2" some thread or another on the other end. |
| 03-06-06 | This evening I greased the 4-bolt spindles, bolted on the brake caliper mounting brackets and pressed in the axles. |
| 03-05-06 | Dad came over and we did some work.
|
| 03-04-06 | I made some progress on SONEAT this evening. Mostly, disassembly and removal stuff. Removed:
I also drained the coolant, put a trickle charger on the car and sandblasted the 4 bolt front hubs. |
Dad took the car to the VSCCA Turkey Bowl. He had some overheating problems (air bubbles in the cooling system) and absofreakinglutely toasted the front brakes. Blew the pistons out of both sides and spewed ATE Super Blue brake fluid all over the wheels and tires. Metal on metal doesn't begin to describe it. The backing plate is welded to the piston. The clutch was slipping too. Otherwise, it did fine. |
|
| 10-05-05 | Found that the reason the starter died when we tried to put it on the trailer to come home... The wire fell off. I recrimped the spade connector, refitted, and all is well now. |
| 10-02-05 | 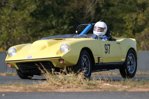 Suffice it to say, we had a very good event with SONEAT. A full report will be forthcoming. |
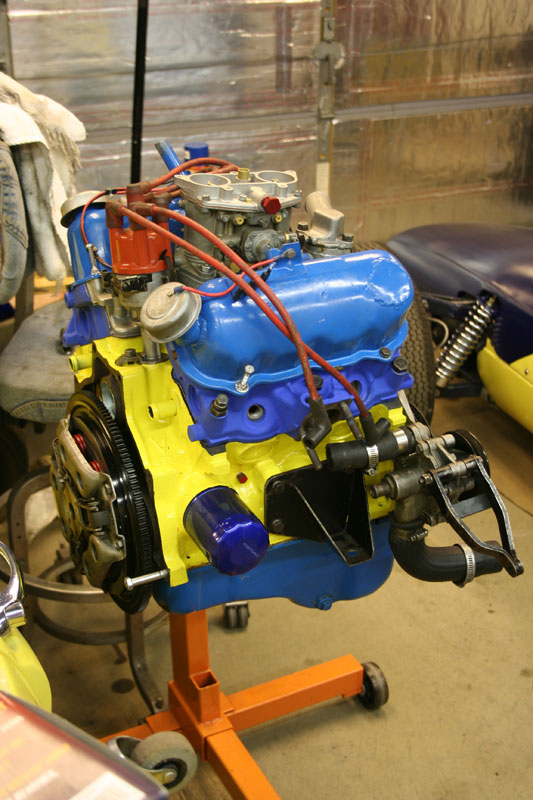
| 09-28-05 | The cylinder heads arrived! 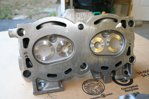
We painted them blue (no time for the yellow paint) and stuck them on the motor as fast as we could. Not long thereafter, we gave the starter a kick and "cranka-VROOOM!" I could NOT believe it. A motor that hasn't run for over a decade and was recently rebuilt started on the first crank. Niiice. The rest of hte preparations were made and we loaded her up to go to Summit Point. Fingers crossed and wood knocked. |
| 09-26-05 | There was a puddle of blue under the brake master cylinder when I got out to the car this evening. I was all "Oh damn" and down in the dumps for a while. After I got a good look at it I realized that the brakelight switch was loose and that was where the leak was coming from. I was able to put another full turn on the switch and get it tightened down. I wired up as much as I could at this point:
I installed the new radiator-to-expansion tank hose and zip-tied it to the fan shroud. Speaking of fans... After I wired it up I test ran it and found that with the new radiator in place, there was just the slightest interference. I had to shave a little of the back of each fan blade to keep it from hitting the oil pan and front cover. I sandblasted and painted the:
We are having some trouble coming up with a new water pump belt. The old one is shredding and not long for this world. Both the new ones Dad came up with are too long. |
| 09-25-05 | In the morning, I replaced the driver's side steerig rack bellows and ball joint. In the afternoon, Dad and I rebuilt and reinstalled the brake master cylinder. After putting the clutch master cylinder back in place we flushed and bled the brakes. We seem to have a good pedal now. Dad relocated the coolant expansion tank to the driver's side of the engine bay. More room! We re-set the toe and that will do for an alignment for now. |
| 09-24-05 | Dad came over and we got a fair bit done. I put the oil pan, flywheel, cutch and motor mounts on the motor and got it as far along as possible without having the heads to go with it. Dad and I hung the lump on the chain hoist and installed the motor in the car. That went about as smooth as EVAH! A good omen? Dad installed the electric fan on the new radiator and we put the assembly in the car. The new radiator was just slightly wider than the old one, so we bent the lower mounting tabs outwards a bit to make it fit. I put the starter on and bolted the motor down to its mounts. |
| 09-23-05 | Dad picked up the completed radiator from Ralph (Cloverleaf Auto). It uses the same end tanks but is a thicker (high flow) core with 4 rows instead of the standard 3. |
| 09-21-05 | I installed:
|
| 09-20-05 | I sandblasted and painted the intermediate plate and one of the valve covers that came with the new motor. |
| 09-19-05 | I cleaned all the bolt holes and blew a suprising amount of mouse nest out of the yellow motor last night. I thought I got it all when I had it in the parts cleaner, but apparently not. Anyway, I'm fairly certain it is all good now. (Famous last words). I removed from the old open-deck 1500:
I installed in the new closed deck yellow motor:
Incidentally, when eyeballing them side by side, the camshaft from the open-deck motor looks to have longer duration than the one from the closed-deck motor. Lift is probably the same. Just by eyeball. |
| 08-31-05 | We sent the heads off to Jack and Pat Lawrence at MSS. After looking at the (in Jack's words) exceedingly poor" porting job that had been done, we decided to shelve those heads for the time being and to have Jack make up a set of his heads for us. These would be later 1500 or 1700 heads so they wouldn't have the headbolt intrusion in the exhaust port. |
| 08-21-05 | Removed the brake master cylinder so we could rebuild it. (Had to pull the clutch master cylinder to get enough room to pull the brake MC.) We pulled it apart and the piston bore looks really good. The outer seal bore however, has some rather severe pitting. That explains the leaking. Drained the oil from the open deck motor. |
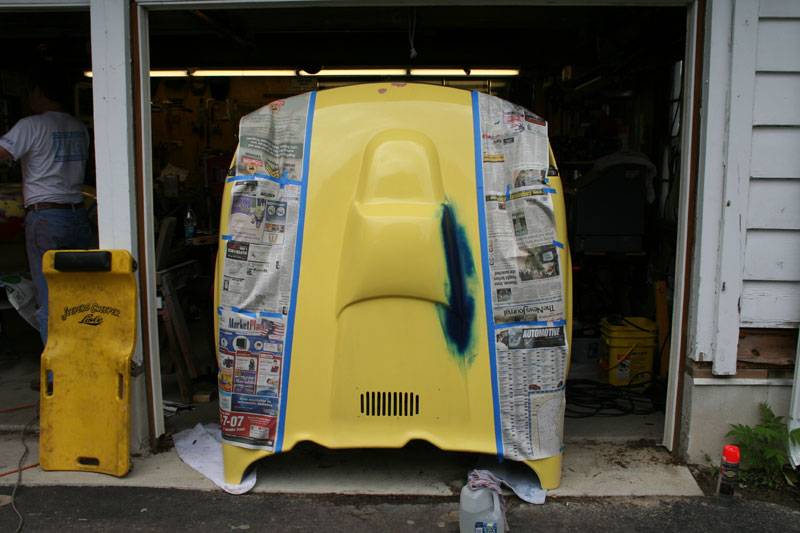
| 08-12-05 | Added the final topcoat. There are a couple spots where the paint ran and a couple where it could have covered better but I'm likely to be the only one who notices. Pics are here. |
| 08-11-05 | Metal-prepped, POR-15'd, and 1st color coated the engine block. It still needs another topcoat, but then the block will be mostly ready for prime time. I also pulled the water pump and fan off the front cover, but fell short at figuring out how to remove the fan shaft and bearing. |
| 08-09-05 | Scraped and wire wheeled the engine block to remove as much rust and old gasket material as possible. |
08-08-05 |
I removed the oil pump and Safety-Cleaned the block with the pistons, crank, camshaft, balance shaft, balance shaft gear and crank gear all still installed. |
08-07-05 |
Purchased a spray-bomb of engine enamel in "Old Ford Blue". Nothing special, just run of the mill corner auto-parts store stuff. It will coat the valve covers and such. |
08-02-05 |
Purchased an engine painting kit in Hi-Po Yellow. $45 plus shipping. |
07-24-05 |
Dad and I disassembled the new motor to the point where we could see what we had. The heads, pan and all covers are off. It is DIRTY but generally seems decent. |
| 07-27&28-05 | Dad and I pulled the injured motor out of SONEAT. When we removed the headgaskets, we weren't able to definitely determine where the combustion chamber leak was. We were a bit dissapointed in that since it didn't help us to know what to change for next time. |
07-24-05 |
Dad went to NY to meet Al Tirella and purchase an old modified motor Al had been saving for years. Here's what we knew of it at the time:
Dad paid $350 and also got some miscellaneous gaskets in the deal. A good deal I think. |
| 07-9&10-05 |
SONEAT goes to the PVGP Historics at BeaveRun Motorsports Complex. The event was not a total success, but neither was it a total failure. The car did run well, for a while. We learned more about how the car handled and what her strengths and weaknesses were. In the end the motor still leaked water and we still blew a headgasket and had to shut it down early... But not before getting in a few sessions and generating some good video footage. |
| The headgaskets didn't seal up too well. They leak coolant. So we poured in some Ceramic Engine Seal put out by Moroso. It worked wonders in getting things sealed up. I'm amazed. I generally don't go for "snake oils" of any sort and I didn't have much faith in this either... But it seems to have done SOMETHING? | |
| We rebuilt the motor with a set of head gaskets that Jeremy and Dad fabricated. They are copper, hand cut, annealed, with silver wire soldered around the combustion chamber. They're a great piece of work but who knows if they'll work? | |
| We cut and installed a new set of (4) springs, on which we cut off only 1.5 coils (rather than 2.5 like last time). | |
| Jeremy fabricated a seat-back support out of aluminum. It has different set points for my seat placement vs Dad's. | |
| 05-01-05 | VIR was a success for SONEAT in only one sense... She met my fantastically low expectations. I took her out and made a few slow laps and when I was reasonably confident that she wasn't going to kill me, after about 4 laps... I started to increase speed. I upped the rev limit from 5000, to 6000, then to 7000 and "pppfffttt!" The car started acting rather strange. The tach started wagging wildly. The temp gauge went all peggy. The fuel gauge went all whacky and the engine went all... Quiet. I got back to the pits and was reasonably sure I'd blown a headgasket. That didn't explain everything the car had done though, something else went wonky? Ah... When I turn the motor over the water pump doesn't turn! That means we've stripped the balance shaft gear. Jeremy blocks up the motor and drops the oil pan until it hits the chassis. He'd digging around in there pulling out bits of gear teeth while Dad and I are on a marathon 7 hour trip to visit West of Sweden. Later, we return with a standard balance and camshaft gear set. Dad and Jeremy go home to Durham and a home cooked meal. I go to the event banquet for dinner with a clean shirt on. Then I get back and put on my engine-work shirt. Then I succumb to peer pressure and go to the clubhouse for some beers, in a clean shirt again. Later, much later, we get back and I re-dirty-shirt and start digging into the motor. I get it all buttoned up sometime around the witching hour and go to sleep in the trailer. In the bright morning light, I fire up the motor only to find that the headgasket is indeed... Blown. Game over. I learned all kinds of things from this. The only thing that I can write without resorting to the Shift-key is that I learned the springs are cut too low... The tires were rubbing. |
| April-ish | The motor eventually got together somehow. After 2 or three tries we even got it to seal up with a set of old stock headgaskets. Off to the races... |
04-04-05 |
I heard from Paul at the machine shop today. The block is a bit of a bastard. Who knows what sort of previous life it has led but I think this will be its last rebuild. It seems to have a 40 over bore but piston clearances are between 2 and 5 thousandths. 2 isn't bad but 5 is maybe on the loose side. I ordered some balance shaft bearings quick-shipped to the machine shop (Alderman Automotive Machine) from West of Sweden. |
04-03-05 |
While Dad was at Lime Rock racing the Quantum One I worked on getting some more done on SONEAT.
|
03-27-05 |
Dad and I refitted the rear body. In doing so we discovered that the oh-so-pretty-polished-power cutoff switch plate won't work. Yes, the hole for the switch is dead center, but that puts the switch too close to the edge of the chassis and we didn't want to enlarge that hole any more, not in that semi-structural zone. So, the plan is to make a new plate with the hole offset. Also, in the process of refitting the body I broke one of the reverse light glass lenses. Damn Sure, it is probably going to be the only car on the track with working reverse lights but still... Damn. |
03-26-05 |
I polished the cutoff switch mounting plate and sanded the engine bay crossmember. Then, I installed the crossmember (after some minor modifications) in the chassis and Dad installed the cutoff switch plate in the body. |
03-25-05 |
|
03-20-05 |
Down at the southern team headquarters in Durham, NC... After measuring and checking things over, Jeremy and Dad reassembled the pressure plate. In a related note they weighed three flywheels:
We will be putting SONEAT's 13 lb flywheel back in for the time being because the 10 lb one still needs more moidification to work. At a local scrapyard they found an aluminum can that we are going to try and use as an oil catch-can. In my garage work progressed too...
|
|
I disassembled the pressure plate to look for cracks in the "fingers". |
03-03-05 |
I did some playing in the garage...
...and Dad received some more parts in the mail...
|
02-28-05 |
Dad placed an order with Speedway for some more fuel fittings and braided steel armored fuel lines, a coolant expansion tank and a convex center rear view mirror. |
Dad, Jeremy and myself all worked on SONEAT for the entire afternoon and a little bit after dinner.
|
|
02-25-05 |
Dad fabricated some new fuel lines. |
02-22-05 |
Dad fabricated a flange for the new stright-pipe-tailpipe for the exhaust and started to repair and modify the fiberglass windscreen support. The stock supports will be glassed into it and hidden after painting. |
02-21-05 |
Dad fabricated and painted a bracket for the feul pressure regulator, installed some rubber bits where we wanted to cusion parts. |
02-19-05 |
Today Dad and I got started on a lot of the things that need to be done for the car to be race-ready in mid-April. That is our goal by the way... There is a VRG race at VIR (full course) that we want to make. Here's what we finished:
|
02-19-05 |
Down in North Carolina, Jeremy (the head of our team's southern contingent) completed the fabrication of the delrin suspension bushings. All the front suspension bushings will be replaced with these. We will wait and see what the balance of the car is before we decide whether or not to fabricate delrin bushings for the rear suspension trailing arms. |
02-13-05 |
Needless to say, it has been a while since I've found the time to update this log (more than a year). A lot has happened, none of it good (until very recently). Briefly, the car was put together and run at the 2003 National Saab Owners Convention at in Hershey, PA. There, it blew a head gasket. We gave up for a while and concentrated on other cars. With the formation of the VRG (Vintage Racer Group) we now have a place where we want to run SONEAT in a road-race configuration. The car is now being converted from autocrosser and street toy to roadracer. So far we have:
That, in a nutshell is where we sit right now. The plan for the engine is to take it to George Alderman's machine shop and have them deck the block and shave the heads very lightly so that we are sure we have flat surfaces for the head gasket to seal. I may look into some of GasketWorks' special gasket sealing rings. We'll see. The windshield is being "replaced" with a few inches of lexan which will serve as nothing more than a wind defelctor. I am going to build an improved roll-bar. |
08-24-03 |
Dad and I continued to hook up the engine today. |
08-23-03 |
Jeremy and Dad brought the engine hoist back from Jake's today.
I tapped out the one valve cover bolt hole in the intake that has ben stripped for ages.
It is now M7-1.0 thread. Bolted on the valve covers. |
08-21-03 |
Bolted the new rocker shaft assemblies onto the engine. |
05-23-03 |
PERTRONIX! This kit was bought from West of Sweden. |
05-11-03 |
For
reference: ARP part # 154-6002 |
05-07-03 |
For
reference: Ford Service Part # E9RZ-6563-A The above part number is a complete rocker shaft assembly. It comes fully assembled and ready to drop into the V6. So in buying the new rocker shaft you also get new rocker arms! I mention this because I was suprised to find this when I opened the package. I thought I was just buying a bare shaft. It makes the price seem so much more reasonable though, doesn't it? It is a fairly simple job. I cut
mine down with an air-disc cutoff wheel and then dressed the ends on a
belt sander. I drilled out the inner diameter of the shaft to accept
the end plug (done on a lathe). Pop in the end plug and you are
done. New V4 rocker shafts! Remember to save the bolts that hold the
rocker shaft assemblies! The ones that come with the V6 assemblies are not the same
as the V4 items. The V6 bolts are shorter. That goes for the pillars that hold
the rocker shafts too! The ones for the V6 are not the same width as the V4 ones.
IIRC the V6 pillars are wider. So keep your V4 ones to install on the
cutdown shafts. |
04-28-03 |
For reference: |
03-09-03 |
Continuing to rebuild the engine. CAMSHAFT # 275130 P.S. I can't find my intake manifold? I think it got packed up during the move and is probably somewhere in the storage unit... under a great heaping pile of stuff! |
Previously |
I made a VERY "shade-tree" modification to the small end camshaft bearing in order to get the camshaft to fit. I sat there and sanded it down with ultra-fine sandpaper and my finger! Ugh. Not exactly high tech or accurate but, my dad thinks it will work. I sure hope so, it's a lot of work to get this deep into the engine to fix the problem AGAIN! |
12-01-02 |
Currently, the car is in-op. Engine is undergoing a rebuild in my parent's basement. Wanna see why? Because I busted the rocker shafts. One earlier in the year that I bent and the other recently that broke in two. |
08-25-02 |
The brake master cylinder leaked some fluid around the pedals and it really ate the paint. So I cleaned it up with a wire brush, painted on some Eastwood rust inhibiting primer, and finished coated it with some Eastwood Chassis Black paint. I also found that it
would be much easier to remove the throttle pedal next time if the screws
were welded to the pedal. So I did that. |
|
|
06-09-02 |
The heads have returned from the machinist. MSS (Jack Lawrence) supplied the parts and a friend of a friend who has a machine shop did the machining and install work. I painted them racing red. |
03-18-01 |
Started the project of figuring out the stalling under
braking problem... carburetor levelling. |
 Installed
 Throttle
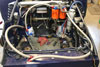 Progress
 Progress
 The motor


-STEFAN Vapaa
|